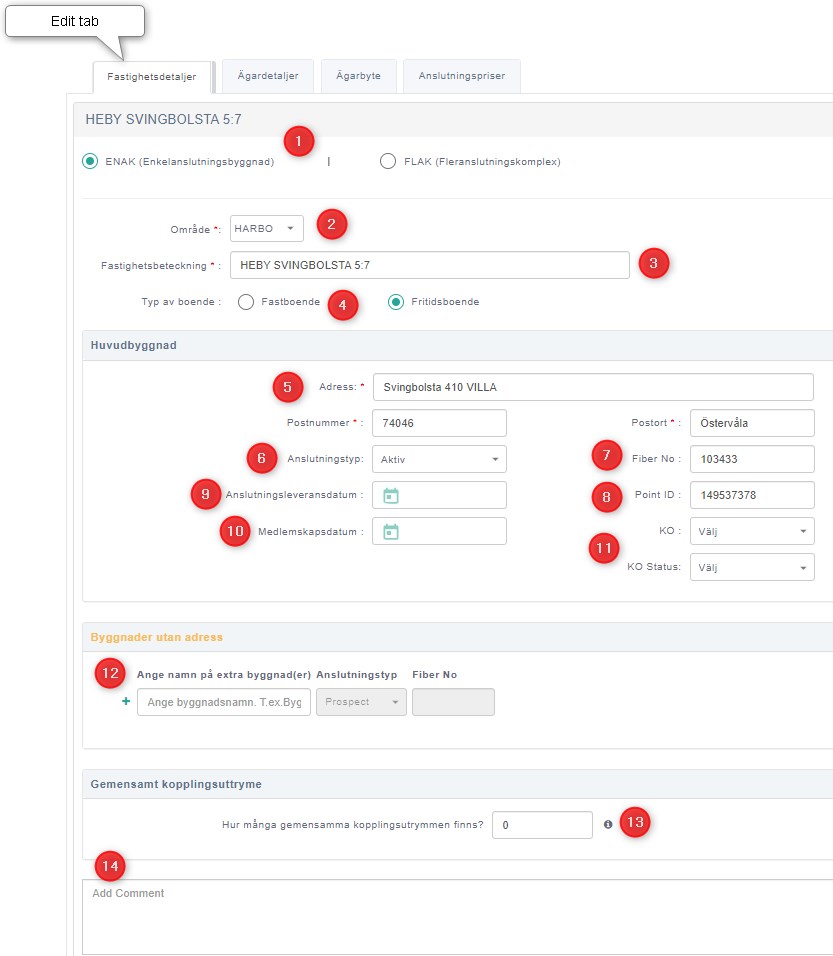
- It is possible to change the building arrangement (ENAK <-> FLAK). Depending on the building arrangement, the structure of the edit window changes.
- Change area. It is possible to assign the property to a different area.
- Change property name
- Change the type of the property
- Change address details
- Change connection type
- Change fiber ID
- Change point ID
- Set connection delivery date
- Set the connection membership date
- Update communication operator and status
- Add/remove extra buildings and their connection information
- Add/remove common connection spaces. (note: Based on the changes to the common connection spaces, it is possible to set up the fiber network inside the property)
- Add comments
Note: When the user clicks on the save button, a confirmation pop-up appears with further steps.
Confirmation pop-up
Step 1:
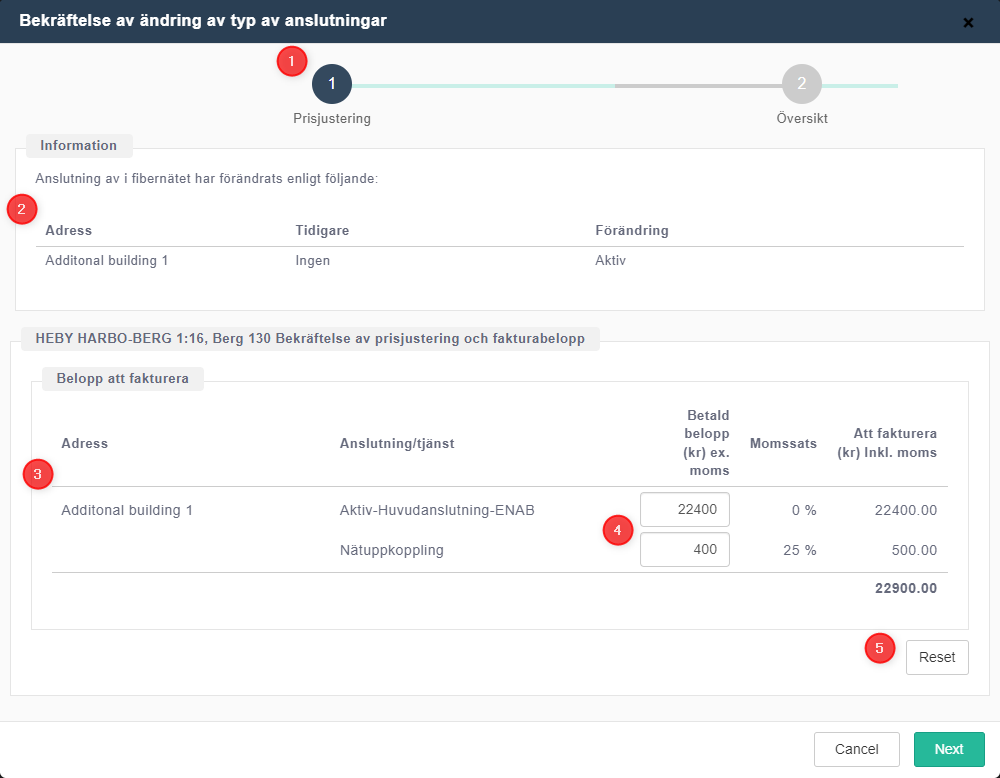
- Indicates that the user is in the first step of the wizard, which is the “Price adjustments” window.
- This is the Information section. It shows all the changes the user has done to the property. (Example: buy new connection, change connection status, add a new building, etc..)
- This section shows the amounts to be invoiced and/ or credited.
- User is given the option to change the invoice/ credit amounts. (Example: increase price of a new purchase, give discounts to new purchases, reduce the amount to be credited, etc..)
- Reset button. Clicking on this will reset all the changes the user has performed in the above sections.
Note: Clicking the next button will take the user to step 2 of the wizard.
Step2:
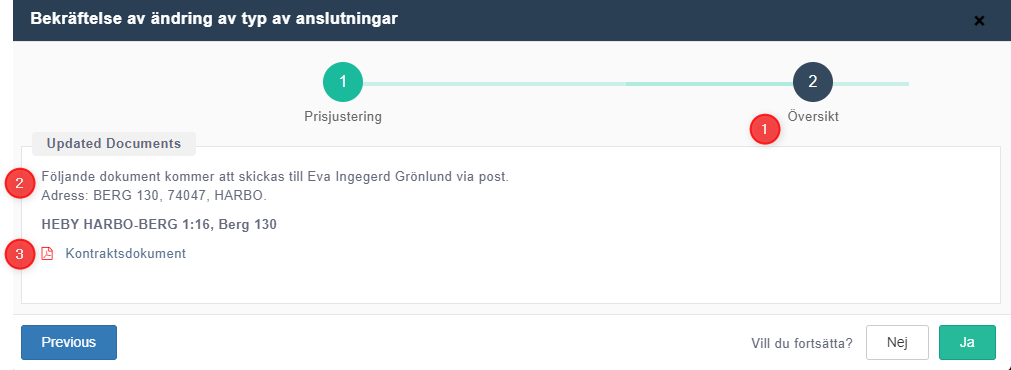
- Indicates that the user is in the second step of the wizard, which is the “Overview of adjustments” window.
- This section shows the updated documents. It shows the communication method and the address that the documents that were sent.
- Click the PDF icon to download and view the contract document, invoices, and credit notes.
Note: clicking the button “Yes” will save the changes.
Confirmation pop-up with complex scenario
Step 1:
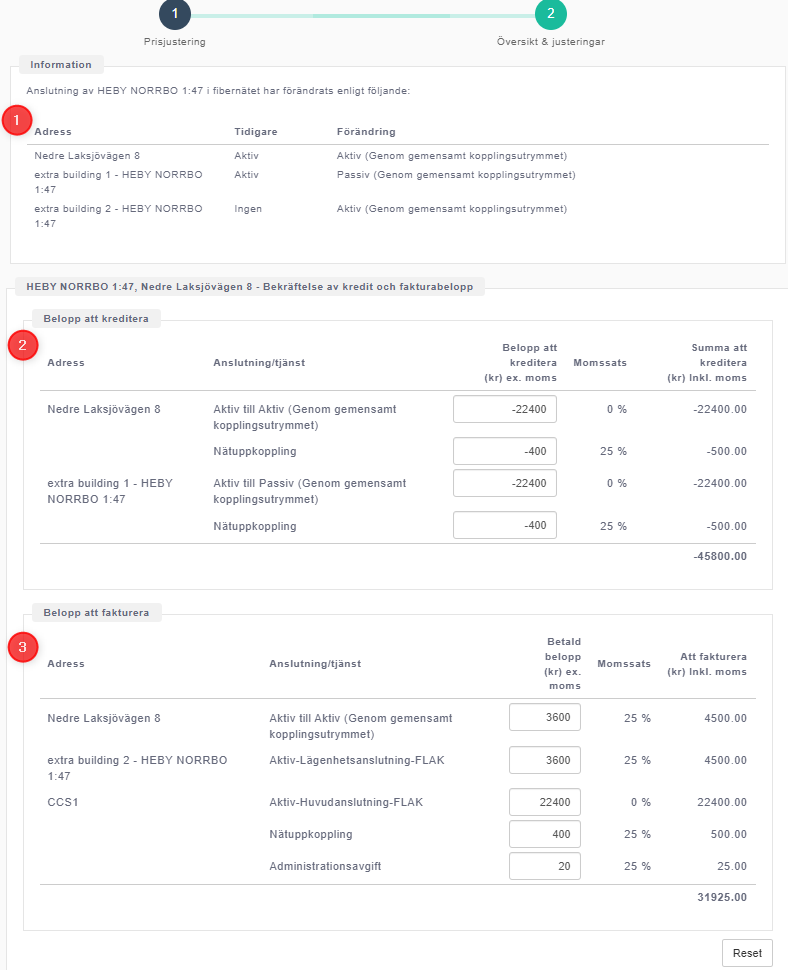
- Information section shows multiple changes occur on different addresses.
- Credit note section shows multiple credit lines.
- Invoice section shows multiple invoice lines.
Step 2:
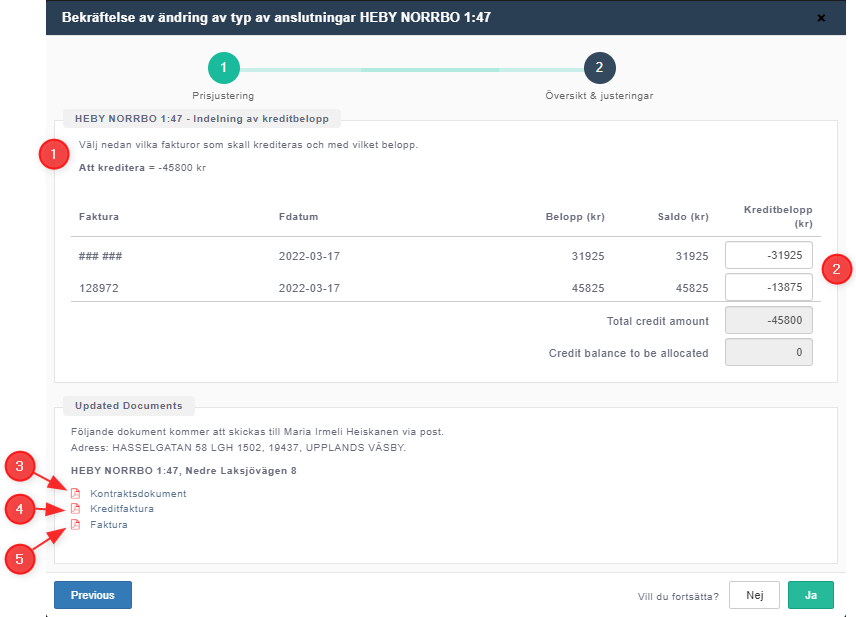
- Breakdown of the credit amounts.
- System suggests the allocation of credit amounts to the existing and new invoices. The new invoice to be created is indicated with the “#” sign in the invoice number.
- The link to view the PDF version of the amended contract.
- The link to view the PDF version of the credit note.
- The link to view the PDF version of the new invoice.
