The system facilitates the subscribers to apply for fiber connections by themselves.

‘Apply for subscription’ button is enabled only when the admin enables the area for subscriptions At least one area must be enabled to enable the button.
Clicking on the button directs the user to the login section.
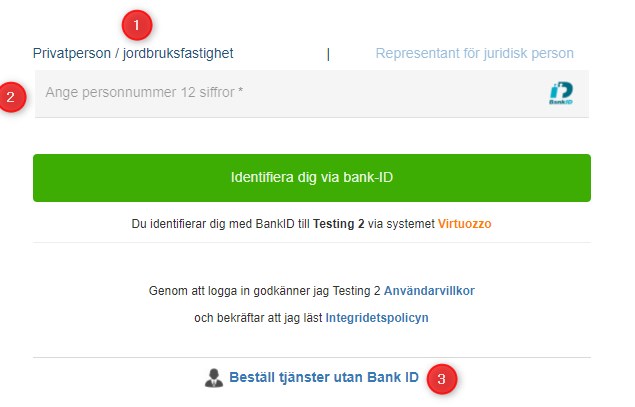
- log in as an individual user
- Enter social security number and validate the SSN by bank ID
- User can disable the bank ID validation and log in by using only the SSN
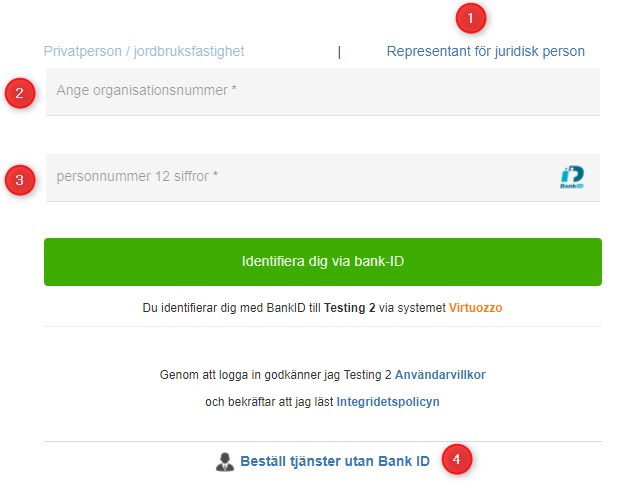
- log in as an organization user
- Enter organization number
- Enter the social security number of the contact person and validate the SSN by bank ID
- Users can disable the bank ID validation and log in by using only the SSN

- Apply for new fiber connection – User can apply for a new connection
- Modify an existing connection – User will be directed to the ‘My Pages’ section
Click the next button to proceed.
Note:
If the user applies for a new connection while having connections for all the properties he owned, he will get the below information message.
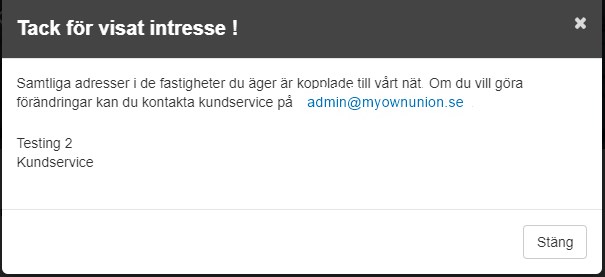
In this case, the user is not allowed to apply for more connections. He should contact the admin for further instructions.
Step 1: Select property, building type and connections
1.1 Select property
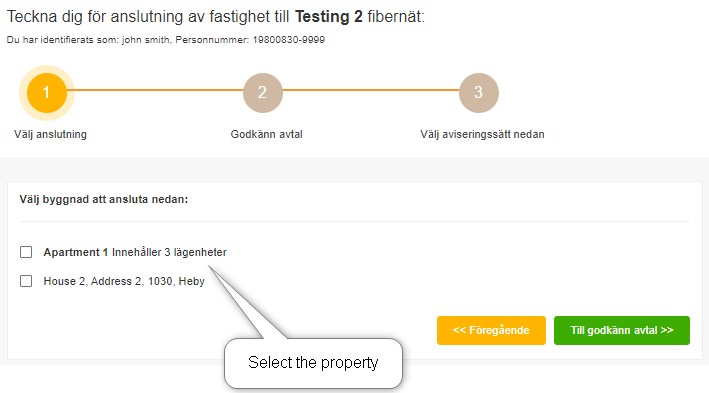
- All the properties under the below criteria are displayed;
- All the prospect (not subscribed) properties that are under the selected SSN/ Organization number AND
- The area to which the property belongs is enabled for fiber subscription by the union
- User can select the property that he wants to subscribe
- Click the next button to proceed
1.2 Select connection type
Select connection type for houses

- A drop-down is given with connection types. The user is supposed to select the required connection type.
- The available connection types (aktiv, passiv, Vilande) is depending on the types defined under the union for the selected area.
Select connections for the apartments

- User must click the above link to apply connections for the apartments
1.2.1 Set building arrangement
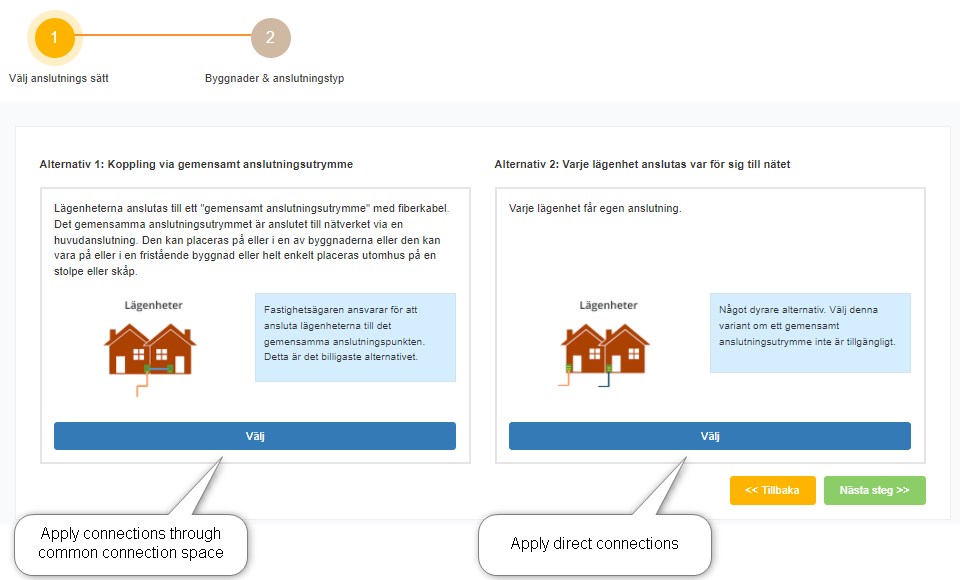
- User must select the preferences for the connection (whether to go for direct connections or to use common connection space).
1.2.2 Select connection types
Apartment with direct connections:
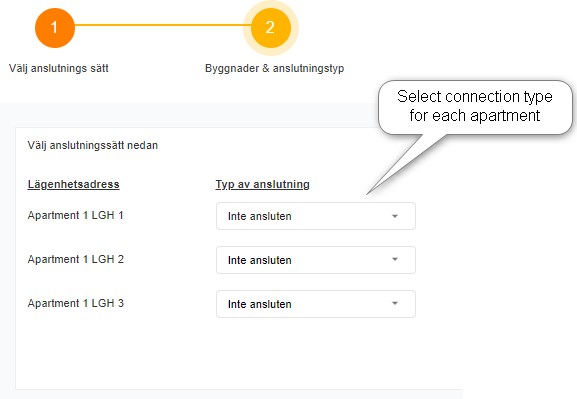
- Select connection type for each apartment.
- The available connection types (aktiv, passiv, Vilande) is depending on the types defined under the union for the selected area.
Apartment with Common Connection Spaces:
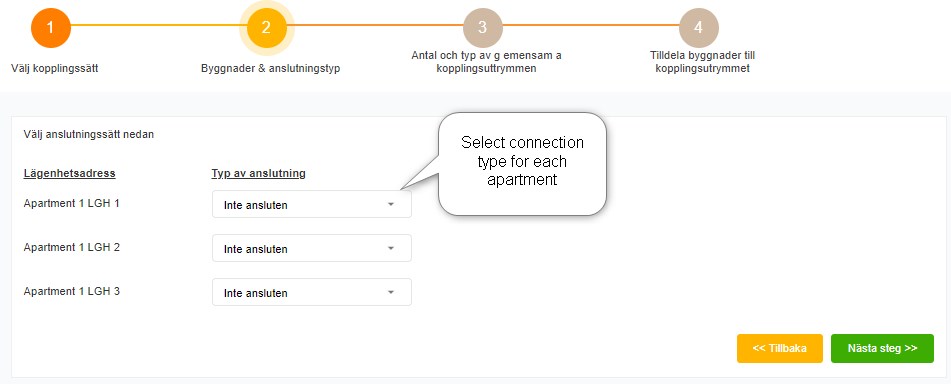
1.2.3 – Set common connection spaces for apartments
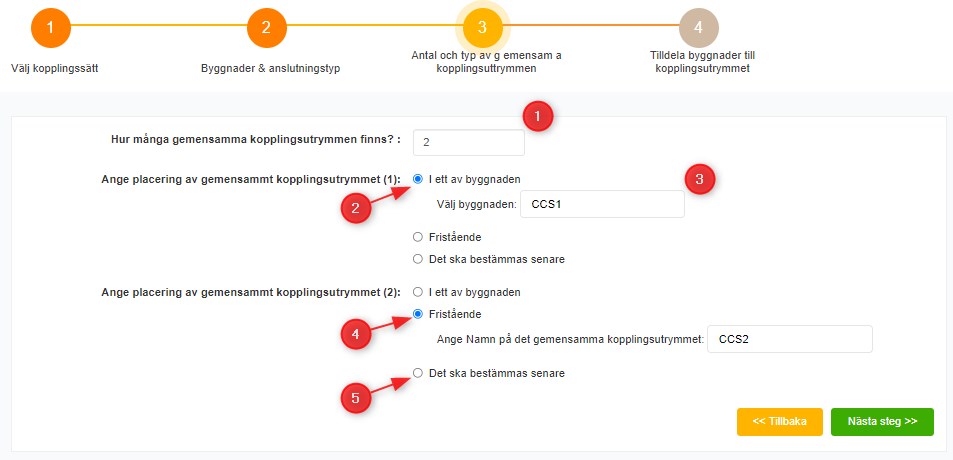
- Set the number of common connection spaces needed
- Select this option if the common connection space is needed to be located inside the building
- User is required to set a name for the common connection space
- Select this option if the common connection space is needed to be located outside the building
- Select this option if the user has not decided the location for the common connection space
1.2.4 – Allocate Apartments to CCS
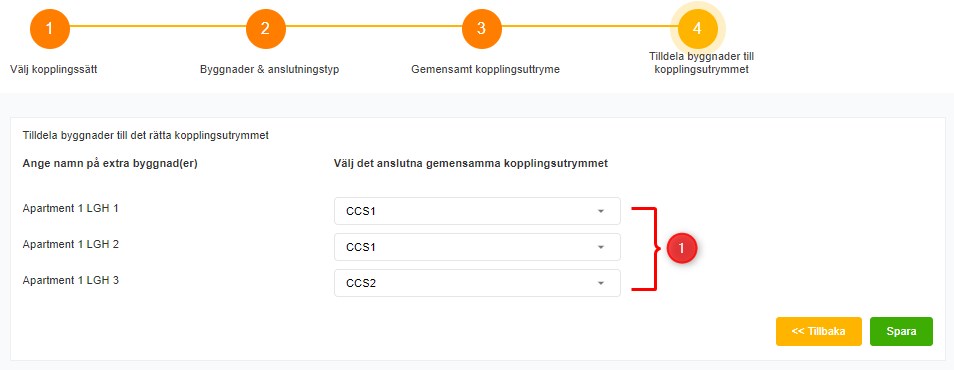
- Allocate apartments to the defined common connection spaces
Clicking on the save button leads the user to the main page that shows the connection prices based on the building arrangement and the connection types.
Note: Steps 1.2.3 and 1.2.4 are applicable only when the common connection space exists.
Connection Details
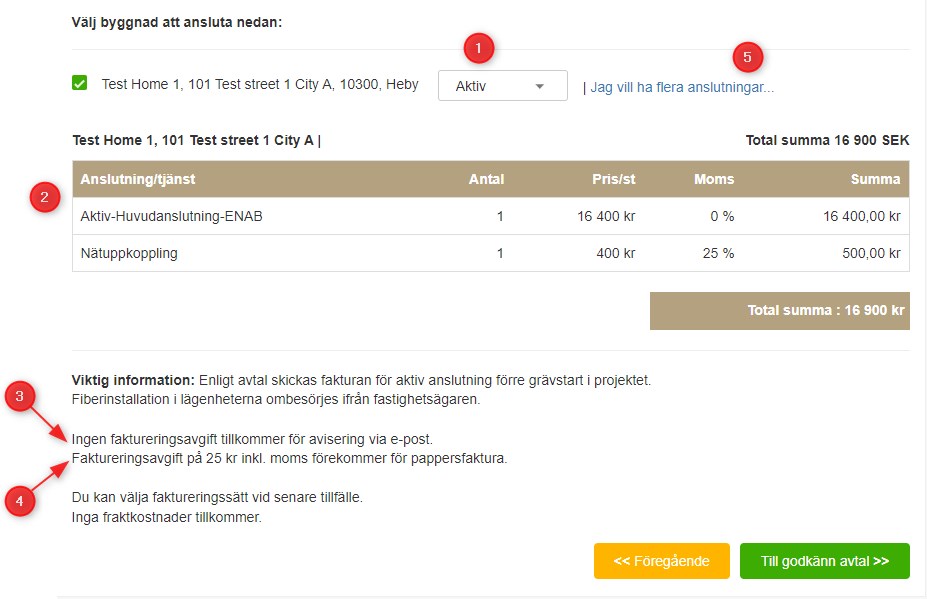
- User is requested for an ‘Active’ connection
- Connection details are displayed.
- Example: in the above scenario, an active connection price (16 400 kr) and the network fee (400 kr + VAT) are applied.
- Indicates that the connection has no chargers for e-post. (This depends on the chargers defined in communication expenses under settings)
- Indicates that the connection has a 25 kr postal charge (for more information, refer to settings)
- User is given the option to add more connections (for more buildings in same address)
Add more connections to extra buildings in the same property
Add more connections to the extra buildings without addresses on the same property
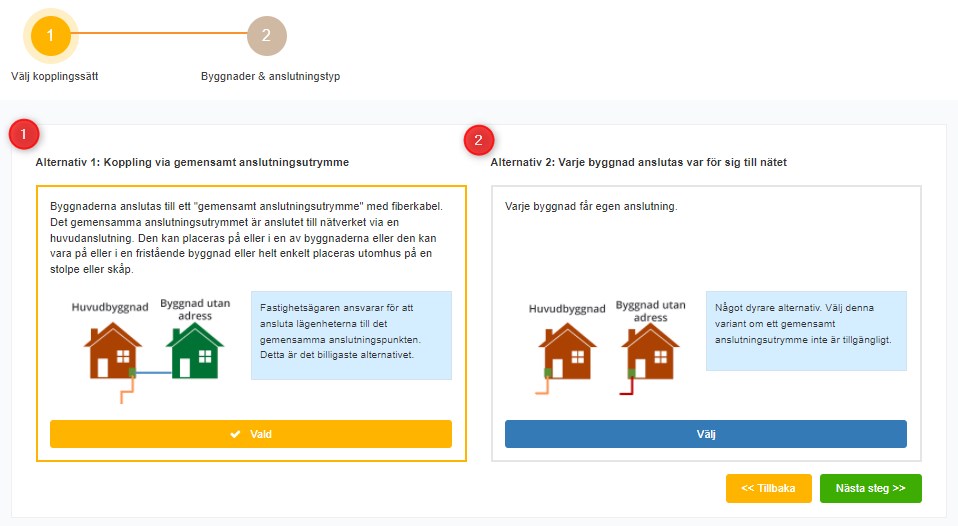
- Option to add a connection to an extra building (without address) through common connection space
- Option to add a direct connection to an extra building without an address
Select the preferred option and click the ‘next’ button to proceed.
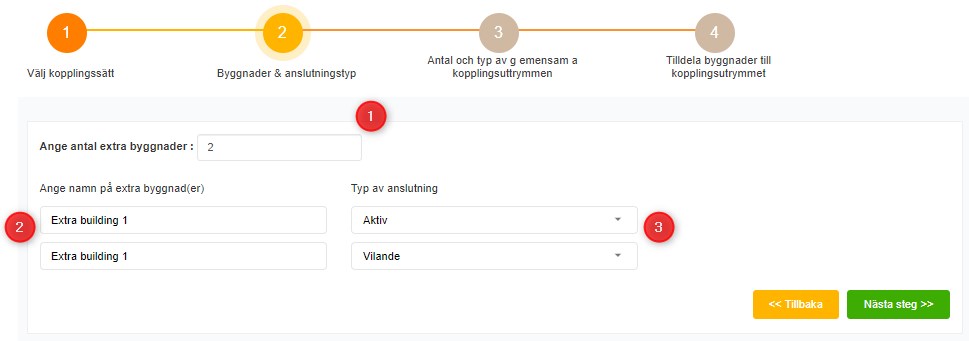
- Set the number of extra buildings
- Set names for the extra buildings (user can set names as per his preference)
- Select the type of connections to be added
Click the ‘Next’ button to proceed.
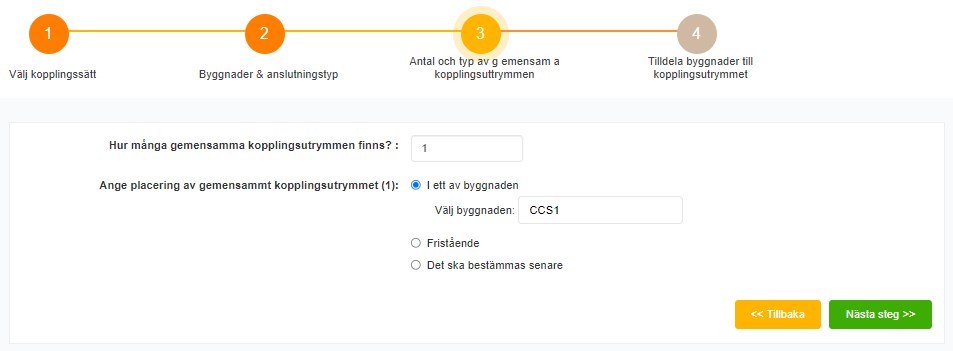
Set common connection space and proceed with the ‘Next’ button.
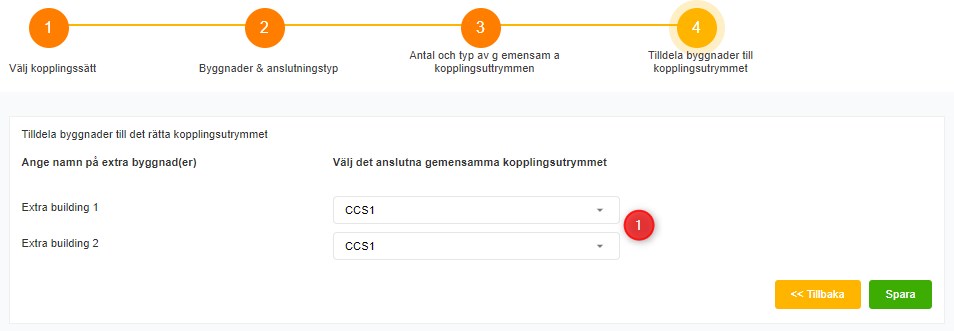
- Allocate extra buildings to common connection space and ‘save’ button to proceed.
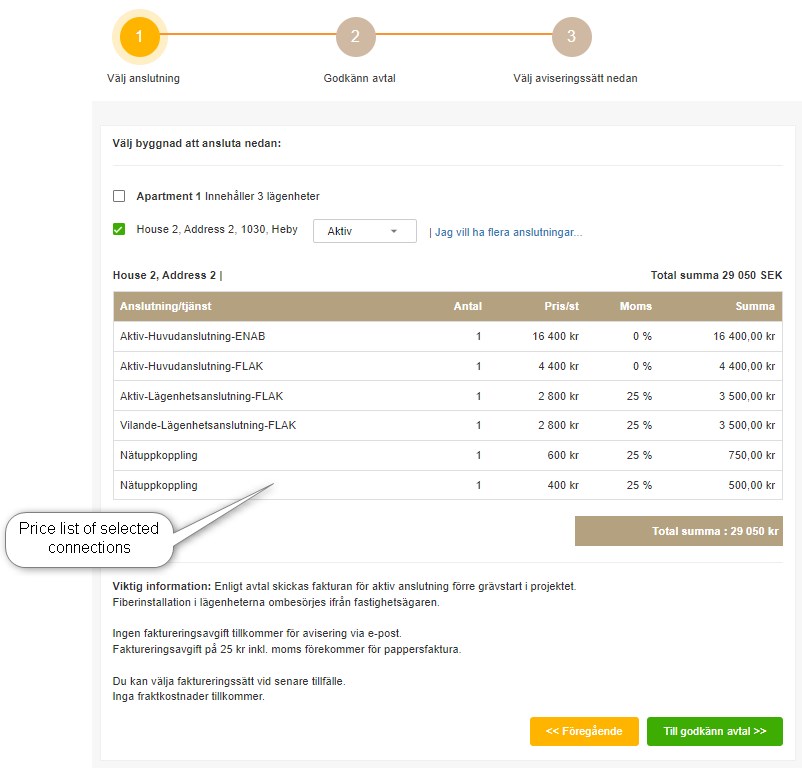
Click ‘Till godkänn avtal’ button to proceed to the next step and view contract document.
Step 2 – Fiber contract document & agreement
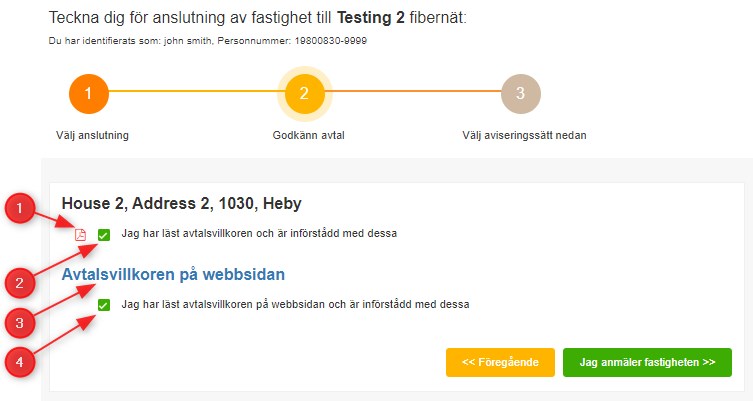
- View fiber contract document
- Click to accept the fiber contract
- Click to redirect to the ‘Terms and conditions’ page
- Click to accept the terms and conditions
Step 3 – Set communication preferences
At this step, the user is given option to set his communication preferences to receive invoices and other general messages.
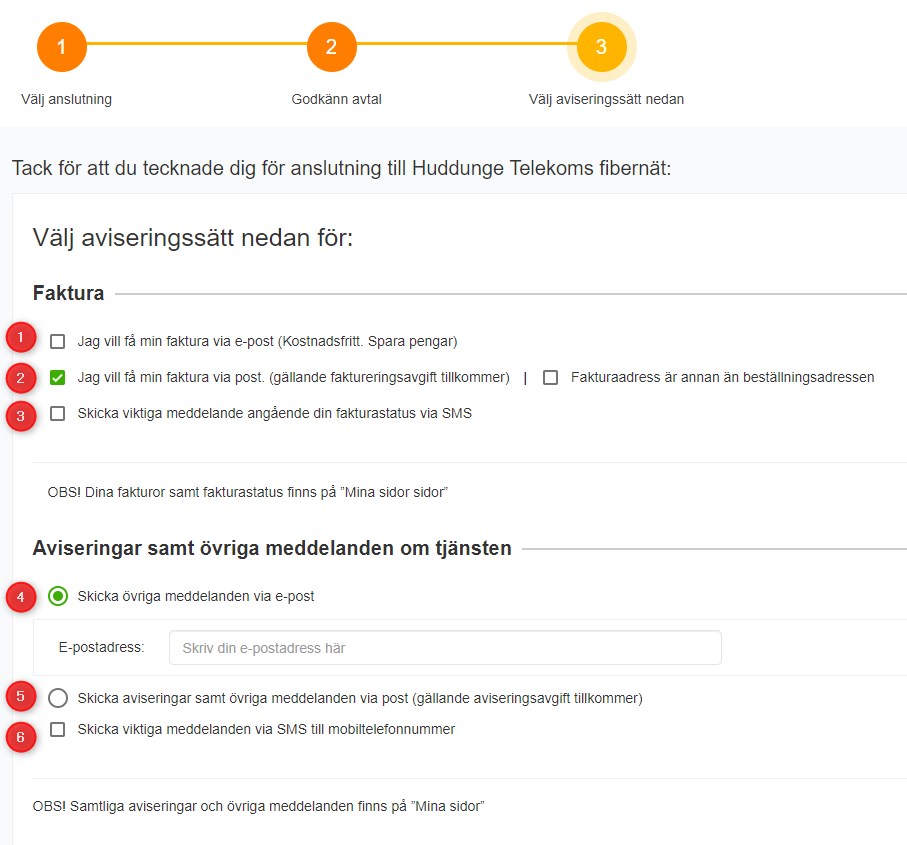
- Request to send invoice via email
- Request to send invoice via post
- Send important message regarding your invoice status via SMS
- Request to send other messages via email
- Request to send other messages via post
- Send important messages via SMS
Invoice communication preferences
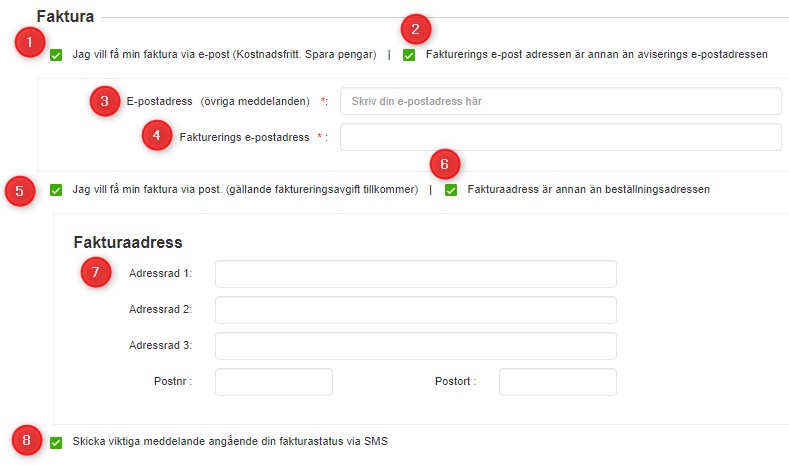
- Request to send invoice via email
- Select if the invoice to be sent to separate email address
- Set general email
- Set invoice email
- Request to send invoice via post
- Select if the invoice to be sent to separate postal address
- Set general postal address
- Set invoice postal address
- Send important message regarding your invoice status via SMS
- Set the communication preferences and click the ‘Complete’ button to complete the fiber subscription process.
- Successful subscription will give below success message.
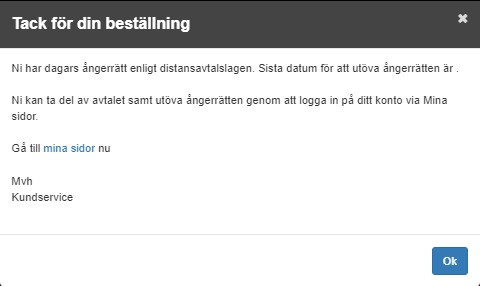
- The user receive notification (based on his communication preferences) and the admin will receive an email.
